I did not have a chance to do any projects this past week since we had company. But I am hoping to be able to get some work done this week. My husband turned 70 and his sister flew in from Connecticut to visit. We had a great time.
 This was originally posted in 2013. Many posts prior to April of 2014 are not available anymore. I hope you enjoy this one.
-------
Do you have some old cigar boxes sitting around? Don’t know
what to do with them?
How about painting and embellishing them to create a
keepsake box? It would make a great birthday or Mother’s Day gift.
While looking through my notes and lists for projects I
remembered this wooden cigar box I found at a yard sale a few years ago.
I started by removing the stickers and labels. A little
water, some time and then sand paper helped me clean the box and get it ready for
some paint.
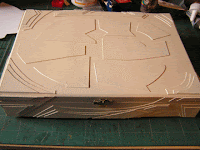
 A nice tan colored acrylic paint was perfect for the base
coat. Then I went looking for some
inspiration. I was thinking ‘Fairy Box’, but got sidetracked by Steampunk.
So I started cutting up cereal boxes and gluing the pieces
on the box. Cereal boxes are a nice lightweight cardboard that can be easily
bent. It isn’t too thick and adds just a slight amount of the raised look I
wanted.
Once all the glue was dry I used the same tan colored paint
to cover everything and give it an even coat.
 For some reason I broke three clothes pins in two days
trying to pin up curtains. So I used the pieces of the pins for my feet on the
box. They raise it up just a little, but enough to make it look cool. Plus they
are unique and fun.
After that dried I used bronze by itself and then mixed with
burnt sienna to get some nice effects.
Inside the box I glued some brown fabric. I decided that
this would be a more masculine box.
For the top I added some necklace chains and some cool
washers. After the glue dried I brushed them with some black and bronze paint
to make them look old and worn. I added some cardboard gears and extra layers
to it to give it more character.
 Between some of the layers I also put several cardboard
gears. At left you see my weights for keeping the cardboard down
while the glue dries. I find any heavy bottles I can.
Everything had to be planned as it was put on so the
layering was right. After cutting pieces out, I laid them on with no glue to
determine what order to put things on. This is important. You don’t want to put
something on with glue then find out something else should have been put on
first. Always do a dry run with the parts first, and keep on testing as you put
it together. Lay each piece on as you go to double check the layout. (talking
from experience)
Once everything was where I wanted it, and the paint and
glue was completely dry, I used spray varnish to seal it. Wait at least 24
hours after you finish any painting or gluing to be sure all moisture has
evaporated when using regular varnish. Moisture will cause bubbles or a rough
texture on the surface.
On the corners of the
box I used small sequins. I glued them on and then painted them the same color
as the cardboard. This is a great and very easy way to
simulate brads or screws.
This was a fun project, and very messy. I had paint and glue
all over my hands most of the time. I'm not done with
it. I plan to add more of the sequins to look like brads, and maybe some more
watch parts on the top.
The idea of decorating boxes is one that can be used in many
ways. Kids can decorate keepsake boxes for themselves. Anyone can decorate a
box to give as a gift.
If you don’t have cigar boxes, check Michael’s or Joann’s
for their cardboard ones in the paper mache section. They have white ones that
look like cigar boxes and are only a couple dollars each. You can buy little
clasps or drill holes and add yarn and ribbon to tie it closed.
Have fun, and never worry about being messy. J
Til next week.
Terri
1KrazyRtist


No comments:
Post a Comment